The following is a guest blog by Marc Merullo:
Many people spend a great deal of time outdoors. Parents take their children out for walks to the local park or around the neighborhood. A next door neighbor might be out cleaning the yard, the mailman delivering mail, the Federal Express truck making stops at various houses and businesses. Unfortunately, anyone who is outdoors doing anything could potentially become a Lyme disease victim, since the ticks that spread this can be anywhere.
I discovered this for myself, since I have spent a part of everyday outdoors. From 10 years old through to the present, I was not only outdoors for entertainment purposes, but it was part of my job and part of my responsibilities around the house, since I maintained the yard for my parents by raking leaves, shoveling snow, or sweeping the driveway. And then I got bitten.
Likewise, whatever you are doing in your life, whether working at a job or business, being with your family, you will spend some time outdoors—from cutting the grass, shoveling the snow, and keeping up the yard to spending some time hiking. Wherever you are, you might be the potential victim of a tick and not even know it, because you might not even feel the bite. But soon you will start experiencing the first signs you have been infected by a tick with Lyme disease.
For example, one day you wake up with some minor symptoms, such as a sore neck or elbow. Maybe you have just a slight fever. But since everybody has something minor wrong with them from time to time right, you might think to yourself: “Am I going to waste time and go to the doctor about this sore elbow? No, it must be just wear and tear.” So you don’t go.
But even if you do decide to visit the doctor, he or she may find nothing seriously wrong, since everybody reacts to things differently. So maybe the doctor concludes that you are just experiencing wear and tear or age.
So you start thinking nothing is wrong and go about your business as usual. But as time moves on, you start to experience more symptoms, which could be many things – a sore back, legs, neck; maybe you have a fever or sore throat. But even if you now go to the doctor, he or she could still think these are symptoms of just about anything.
In my situation, I noticed a strange onset of symptoms beginning in 2005 that were gradual at first, so I ignored them. But then I began to experience more and more symptoms that led me to my first doctor’s visit in many years. At first, I had an inflamed throat that was so bad I could not swallow, which the doctor diagnosed as possible flu. So he gave me some medicine to treat it and it did go away.
However, throughout 2005 I noticed a lot more inflammation on various joints, so the doctor gave me X-rays and MRIs, and he diagnosed me with possible wear and tear, but nothing was broken. So while it’s a good idea to make an appointment for a physical when you first feel something is wrong, it can be good when the physical comes back indicating nothing is wrong, but instead the Lyme bug could be lurking within ready to strike when you least expect it.
But despite my all clear diagnosis, as symptoms continued, I became more and more concerned, though the doctor told me everything from "Don’t worry about it" to “It could be stress, because you’re working too much.” Then, I began going to health food stores looking for herbs which can treat various conditions. Some gave relief while others did nothing at all. After three more years of doctor visits and tests at some big hospitals in my area, they didn’t do me a lot of good. since every X-ray, blood test, and MRI all came out normal.
As a result, I still was not diagnosed with Lyme disease until 2008 as a result of a client who is a dentist. I had come into work one day with an inflamed leg that was so big I could not walk. So when I bossed arrived, I went to the hospital, where they diagnosed me with a condition of a cellulitis infection, gave me an antibiotic, and sent me on my way.
The problem was that this was not the correct diagnosis. After I phoned my place of employment to tell them about my hospital visit, the client and my boss instructed me to check for Lyme disease. Though my doctor was reluctant to do the test, telling me, "It is most likely not Lyme disease,” I insisted on them testing me and they did. Then, I returned home, and a few days later, on Monday, the doctor told me the test had come back positive.
That was only the beginning of my ordeal, because Lyme requires many months or years of treatment, and the doctor was only willing to give me three weeks because my insurance only covered that amount of treatment. Also, doctor told me it was acute Lyme disease, when in fact I had a chronic case, because it had been undiagnosed and therefore was untreated for several years.
As time went on, I did more and more research on the disease and concluded that many people are misdiagnosed that have Lyme disease, such as being diagnosed that they have ALS, lupus, fibromyalgia, chronic fatigue syndrome, possible attention deficit disorder, or other maladies. As a result of such misdiagnoses, people have been read their last rites, have lost jobs, had their families broken up, submitted disability claims, and have even declared bankruptcy.
In short, a person can experience everything going downhill, because a Lyme test was not performed in time to stop the progress of the disease at its initial acute stage. The only way to prevent this terrible fate is to know about and ask for a Lyme test, if you experience any strange symptoms. According to medical researchers, Lyme disease can resemble well over 100 different diseases and invade the central nervous system within a short time.
So how does this disease get started? It is a bacterial illness that comes from a deer tick, which are active 35 degrees Fahrenheit or higher and are in low lying areas. It is also important to seek out a doctor who knows about Lyme disease, if you believe you have Lyme and the infections that come along with it. A knowledgeable doctor should explain the difference between acute and chronic Lyme in your situation.
A big problem in diagnosing the disease is that most people never recall getting bitten by a tick and the blood work for Lyme may show a false negative. The two tests for Lyme are the Elisa and the Western blot. In addition Lyme can be diagnosed through a spinal tap and brain MRI. It is best to ask for these additional tests if the Elisa or Western blot should turn up negative. While these tests may be expensive, if you suspect you might have Lyme disease, it is best to take these tests to avoid what could happen if the disease becomes chronic. You want to catch it in the early stages, when you can easily treat it.
For further information or questions or where to find a Lyme literate doctor, please e-mail Marc Merullo at marcmerullo@gmail.com or marcmerullo@yahoo.com or call (617) 308-4642.
** My name is Marc Merullo I was born in Winchester Massachusetts. I have lived in Massachusetts my whole life. I am 39 years old. I have worked the last ten years as a barber and the ten years prior in the sale of building materials and construction. I believe I was infected with Lyme in 2004 and it didn't get diagnosed for over 5 years. I was an outdoor person my whole life now not as much. I am eventually going to relocate to get a different feel of life.
Jeff
RockyMountainHikingTrails.com

Saturday, September 29, 2012
Thursday, September 20, 2012
Top Ten Items to have on a Day Hike
Below is my list of the top ten things you should keep in your backpack on any day hike. Obviously you will need to make changes to your overall list based on weather conditions, season, terrain and length of trip, but generally speaking, these are the items I consider to be the most important to have on any day hike.
1) Orientation - Take a map and/or guide book with you. National Geographic's Trails Illustrated Maps are excellent. Use the map to keep track of your progress so that you know where you’re at all times. It’s also a good idea to carry a compass, and know how to use it as well.
 2) Hydration - Take plenty of water with you, especially in the summer. You can sweat anywhere from 1/2 to 1 quart of fluid for every hour you walk in the heat. This fluid/electrolyte loss can exceed 3 quarts per hour if you hike uphill in direct sunlight and during the hottest time of the day. If you plan on drinking water from the backcountry, know that it must be treated for Giardia lamblia. Giardia is a parasite that can cause an intestinal infection with a variety of symptoms. To avoid this infection, boil water for at least one minute or use a filter capable of removing particles as small as 1 micron. Liquids such as water or sports drinks are best for you. Drinking soda or alcohol while hiking will dehydrate you. Make sure to pack extra liquids with you in case your hike takes longer than expected.
3) Fuel - The best snacks for the trail are ones that will provide you with high energy, such as fruit, granola, peanut butter, bagels, power bars, fruit bars, G.O.R.P. (trail mix), beef jerky, or even candy. Again, take extra food with you in case your hike takes longer than expected for whatever reason. Throw a couple of energy bars in your pack. They’re light weight, and will pack a nice punch if needed.
4) First Aid - Learn first aid and carry a first aid kit in your pack. Know what to do in case of an emergency. First aid training will teach you how to react and deal with specific types of injuries.
5) Shelter from the storm – No, I’m not talking about toting a tent around with you. I’m referring to keeping rain gear in your pack in case the skies open-up while you’re out on the trail. Weather can be very unpredictable in the mountains. Nothing is worse than getting soaked miles from the trailhead, which can lead to hypothermia. Even during the summer a wet hiker can succumb to hypothermia at higher elevations.
6) Fire – I’m not suggesting you carry something to cook beef stroganoff on your lunch break. But it is extremely important to have some ability to start a fire in case of an emergency bivouac. I always carry a fire source: waterproof matches or some other emergency firestarter. You'll also want to carry some type of tinder, such as fire sticks, or even cotton balls dipped in petroleum jelly and stored in aluminum foil, a zip lock bag or even an old film canister.
7) Extra Socks – Extra socks are a must as well. If you accidently slip into some water, or you’re forced to cross a swollen creek, you’ll want to change your socks right away. Besides having cold feet, you’re almost guaranteed to take home a few blisters.
8) Gloves – Although the forecast might call for a mild day, weather can change quickly in the mountains. Overcast skies, high winds, or light rain, can chill your hands in a hurry, especially in the mountains.
9) Emergency Blanket – An emergency blanket is an excellent item to throw in the bottom of your pack. They’re inexpensive, light weight and take about as much room as a pack of baseball cards. Using a reflective material, they’re designed to reflect your body heat back to you in an emergency situation. You can also use the blanket to ceate an emergency lean-to shelter as well.
10) Knife – preferably a multi-use knife such as a Swiss Army Knife can come in handy in a variety of situations.
There are a few other items you should probably consider having in your pack, but didn’t quite make my top 10 list, including, medications, a whistle, flashlight, bear spray, toilet paper, moleskin, sunscreen, ski hat, cell phone, duct tape. For a complete checklist, please click here.
************************************************************************************
Check out our online trail guides:
1) Orientation - Take a map and/or guide book with you. National Geographic's Trails Illustrated Maps are excellent. Use the map to keep track of your progress so that you know where you’re at all times. It’s also a good idea to carry a compass, and know how to use it as well.

3) Fuel - The best snacks for the trail are ones that will provide you with high energy, such as fruit, granola, peanut butter, bagels, power bars, fruit bars, G.O.R.P. (trail mix), beef jerky, or even candy. Again, take extra food with you in case your hike takes longer than expected for whatever reason. Throw a couple of energy bars in your pack. They’re light weight, and will pack a nice punch if needed.
4) First Aid - Learn first aid and carry a first aid kit in your pack. Know what to do in case of an emergency. First aid training will teach you how to react and deal with specific types of injuries.
5) Shelter from the storm – No, I’m not talking about toting a tent around with you. I’m referring to keeping rain gear in your pack in case the skies open-up while you’re out on the trail. Weather can be very unpredictable in the mountains. Nothing is worse than getting soaked miles from the trailhead, which can lead to hypothermia. Even during the summer a wet hiker can succumb to hypothermia at higher elevations.
6) Fire – I’m not suggesting you carry something to cook beef stroganoff on your lunch break. But it is extremely important to have some ability to start a fire in case of an emergency bivouac. I always carry a fire source: waterproof matches or some other emergency firestarter. You'll also want to carry some type of tinder, such as fire sticks, or even cotton balls dipped in petroleum jelly and stored in aluminum foil, a zip lock bag or even an old film canister.
7) Extra Socks – Extra socks are a must as well. If you accidently slip into some water, or you’re forced to cross a swollen creek, you’ll want to change your socks right away. Besides having cold feet, you’re almost guaranteed to take home a few blisters.
8) Gloves – Although the forecast might call for a mild day, weather can change quickly in the mountains. Overcast skies, high winds, or light rain, can chill your hands in a hurry, especially in the mountains.
9) Emergency Blanket – An emergency blanket is an excellent item to throw in the bottom of your pack. They’re inexpensive, light weight and take about as much room as a pack of baseball cards. Using a reflective material, they’re designed to reflect your body heat back to you in an emergency situation. You can also use the blanket to ceate an emergency lean-to shelter as well.
10) Knife – preferably a multi-use knife such as a Swiss Army Knife can come in handy in a variety of situations.
There are a few other items you should probably consider having in your pack, but didn’t quite make my top 10 list, including, medications, a whistle, flashlight, bear spray, toilet paper, moleskin, sunscreen, ski hat, cell phone, duct tape. For a complete checklist, please click here.
************************************************************************************
Check out our online trail guides:
- Glacier National Park: HikinginGlacier.com
- Grand Teton National Park: TetonHikingTrails.com
- Rocky Mountain National Park: RockyMountainHikingTrails.com
- Just released: Ramble On: A History of Hiking
Sunday, September 16, 2012
Learning the Rest Step
The "Rest Step" is a technique used by mountaineers to slow their cadence, rest their muscles, and preserve their energy while hiking on steep terrain at high altitudes. Essentially, the “rest step” takes pressure and strain off your muscles and transfers it to your bone structure.
Although it’s mainly useful on snow, or on climbs at elevation where endurance is important, it can be employed on any trail with steep slopes. It’s worked quite well for me on many trails in the Rocky Mountains, Grand Tetons, and Glacier National Park in recent years.
 The tool is most effective on slopes that gain - say - more than 800 feet per mile.
Here’s how it works:
As you step forward on a climb, lock your rear knee and keep all of your weight on that rear leg. As you’re swinging your other leg forward, relax the muscles in that leg. Once your forward foot comes to rest on the ground, keep it relaxed so that there’s no weight on it. You can stop in that position for as long as you need to. When you're ready to take the next step, shift your weight to the front foot, step forward with the other and lock the rear knee again, and repeat the entire process.
The locked rear knee provides support for your weight without requiring help from the leg muscle. That means your leg, hip, and back muscles get a rest, if only for a short moment. Stay paused in that position for however long it takes to avoid running out of breath.
In this short video Ward Luthi from Walking The World demonstrates how this technique is put into action on the trail:
A mountain climber in the Himalayas may stay motionless between steps for 10 seconds or more. At lower altitudes, you might only need a half-second pause. The key is to get into a steady rhythm of doing the same thing for each step you take. You can adjust the cadence and the length of your stride according to the steepness of the terrain.
Continuous movement is a great strain on your muscles. Moreover, stopping and starting, slowing down and speeding up, wastes energy. The key to preserving your energy for the long haul is to be the tortoise, rather than the hare.
You can quickly get an idea of how this works by practicing on your steps at home. The benefits are especially clear if you can try it after a long hike, run or bike ride when your leg muscles are already tired. Go up the steps as you normally do and you’ll probably feel a little bit of a burn in your quadriceps. Now, try the rest step and notice how the burn is substantially reduced.
*******************************************************************************
From Montana to New Mexico, the American Rockies stretch for more than a thousand miles. Within this spectacular mountain range are thousands of miles of hiking trails. With such an overwhelming number of options, how will you find and choose the most scenic and rewarding hikes?
Ultimate Hiking Guide to the Rocky Mountains takes all the guesswork out by focusing on some of the most amazing hikes across this range, and provides you with a handpicked list of options that will allow you to make the most of your trips in the Rockies: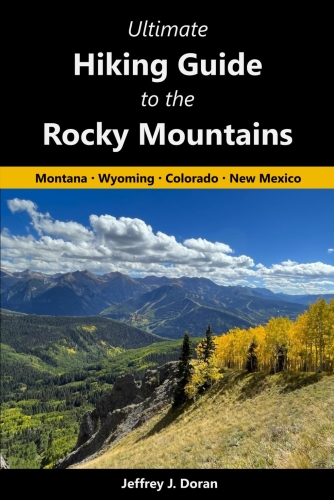
Although it’s mainly useful on snow, or on climbs at elevation where endurance is important, it can be employed on any trail with steep slopes. It’s worked quite well for me on many trails in the Rocky Mountains, Grand Tetons, and Glacier National Park in recent years.

Here’s how it works:
As you step forward on a climb, lock your rear knee and keep all of your weight on that rear leg. As you’re swinging your other leg forward, relax the muscles in that leg. Once your forward foot comes to rest on the ground, keep it relaxed so that there’s no weight on it. You can stop in that position for as long as you need to. When you're ready to take the next step, shift your weight to the front foot, step forward with the other and lock the rear knee again, and repeat the entire process.
The locked rear knee provides support for your weight without requiring help from the leg muscle. That means your leg, hip, and back muscles get a rest, if only for a short moment. Stay paused in that position for however long it takes to avoid running out of breath.
In this short video Ward Luthi from Walking The World demonstrates how this technique is put into action on the trail:
A mountain climber in the Himalayas may stay motionless between steps for 10 seconds or more. At lower altitudes, you might only need a half-second pause. The key is to get into a steady rhythm of doing the same thing for each step you take. You can adjust the cadence and the length of your stride according to the steepness of the terrain.
Continuous movement is a great strain on your muscles. Moreover, stopping and starting, slowing down and speeding up, wastes energy. The key to preserving your energy for the long haul is to be the tortoise, rather than the hare.
You can quickly get an idea of how this works by practicing on your steps at home. The benefits are especially clear if you can try it after a long hike, run or bike ride when your leg muscles are already tired. Go up the steps as you normally do and you’ll probably feel a little bit of a burn in your quadriceps. Now, try the rest step and notice how the burn is substantially reduced.
*******************************************************************************
From Montana to New Mexico, the American Rockies stretch for more than a thousand miles. Within this spectacular mountain range are thousands of miles of hiking trails. With such an overwhelming number of options, how will you find and choose the most scenic and rewarding hikes?
Ultimate Hiking Guide to the Rocky Mountains takes all the guesswork out by focusing on some of the most amazing hikes across this range, and provides you with a handpicked list of options that will allow you to make the most of your trips in the Rockies:
Thursday, September 13, 2012
Hiking calorie calculator
Last week I posted an article that offered tips for keeping your cool during the summer hiking season. One of the most important aspects of hiking while the mercury is high is to make sure that you stay properly hydrated.
As a follow-up, I thought I would discuss the importance of food while hiking as well.
Although most people prefer to eat foods that taste good, you need to think of food as fuel while exercising. During a long hike it’s extremely important to eat before you’re hungry. Simple sugars, carbohydrates, protein, and fat all play a roll in maximizing performance during extended exercise such as hiking. Experts in sports nutrition recommend consuming 100 – 300 calories every hour during exercise.
The best snacks for the trail are ones that provide you with high energy, such as fruit (dried or fresh), granola, peanut butter, bagels, power bars, fruit bars, GORP (trail mix), beef jerky, or even chocolate (in moderation of course!).
Personally, if I’m climbing a lot of elevation - say up to Hallett Peak as an example - I’ll mostly rely on Gatorade, Power Bars and trail mix that includes dried fruits, pretzels, nuts and M&Ms. These foods provide a lot of simple sugars and carbohydrates which offer quick release energy as I proceed up the mountain. Once on top, I’ll usually have a sandwich or peanut butter crackers. These foods tend to include more protein and fat which provide slow burning fuel for the trip back downhill. If you’re properly fueled for the trek up the mountain, your energy needs will be less going downhill.
So now the question is: How many calories do you need on any given hike? This is where the Hiking Dude comes to the rescue. He has an excellent calorie calculator on his website. What makes his calculator much better than the others I’ve found is that it takes into account your weight, plus the weight of you backpack, the distance you’ll be hiking, and how much elevation you’ll gain along the way.
This is an excellent resource that you can use to help give you a rough estimate of how much food you’ll need to pack for a long hike. You can click here to check it out.
Finally, take extra food with you in case your hike takes longer than expected for whatever reason. Throw a couple of extra energy bars in your pack. They’re light weight, and will pack a nice punch if needed.
*******************************************************************************
From Montana to New Mexico, the American Rockies stretch for more than a thousand miles. Within this spectacular mountain range are thousands of miles of hiking trails. With such an overwhelming number of options, how will you find and choose the most scenic and rewarding hikes?
Ultimate Hiking Guide to the Rocky Mountains takes all the guesswork out by focusing on some of the most amazing hikes across this range, and provides you with a handpicked list of options that will allow you to make the most of your trips in the Rockies:
Sunday, September 9, 2012
Tips for taking care of your hiking feet
The following are a few tips, suggestions and strategies for taking care of your feet before and during a hike to help ensure that it isn’t ruined as a result of blisters:
Toenails: Make sure you take the time to trim your toenails before a big hike, especially one that involves long descents. It’s best to clip your toenails as short as possible so that there’s no extra nail length. If need be, file the nails down until they’re flush with the skin. Sometimes I forget to do this and end up with a long nail digging into the flesh of a neighboring toe!
Socks: One way of preventing blisters is to wear proper socks. This means staying far away from 100% cotton socks which absorb sweat and can lead to blisters. It’s best to wear socks made from synthetics, or a blend of synthetics and cotton, which wicks moisture away and keeps your feet drier and cooler. Also, make sure you wear socks that fit properly. Socks that are too big can bunch together in boots and create friction areas that result in blisters.
Finally, I always keep an extra pair of socks in my backpack just in case the ones I’m wearing get wet.
Boots: Much has already been written on boots, including what type to wear, proper fit, etc. That discussion is beyond the scope of this article, but if you’re looking for an informative article on the subject I highly recommend this one. Also, my wife has had problems with blisters, and even lost a toenail while hiking to the bottom of the Grand Canyon several years ago. She’s since discovered that as a result of her narrow feet, she wasn't wearing boots that fit her properly. This article on Backpacker Mag offers solutions for people who have similar issues.
Boot laces: One way to help prevent blisters from forming on your heels, and toes from hitting the front of your boot, is to make sure your boots are properly laced, especially on descents.
When heading downhill it’s important to make sure that your heel doesn’t slip forward, thus causing friction which leads to blisters. The key is to keep your heel secure within the boot, while still allowing some room for natural swelling that occurs in the fore and mid areas of your foot.
Most good hiking boots have two types of eyelets: closed metal rings along the top of the foot, and quick-release types on the top of the boot above the ankle.
On the lower eyelets along the top of the foot, it’s best to lace your shoes with a little give. In other words, not snug, but not real loose either. This will give your foot room to expand as your foot swells during a hike.
Then, on that last lace before you start lacing through the quick release eyelets, do a single, very snug, overhand loop. Lace through the first pair of quick release eyelets and then do another snug overhand loop. Do the same all the way to the top of the eyelets (don’t strangle your ankle though!). This will anchor your heel area to the boot and keep it from sliding.
Another option for lacing boots, especially if you have narrow feet, is to use the technique outlined by the Hiking Lady in this video:
Gaiters: Most people would agree that wet socks suck. Wet socks are not only uncomfortable, but can also be dangerous if it’s cold out. Moreover, hiking for long periods in wet socks is a prescription for blisters.
One way to combat wet terrain, snow, and even sand and pebbles from jumping into your boots, is to wear gaiters. Basically there are two types: high and low. High gaiters are used for snowshoeing and mountaineering, extend to just below your knees, and are designed to keep your socks and pants dry. Short gaiters generally cover the lower part of your shin and are used in warmer weather to protect against wet terrain, sand and pebbles.
Blisters: The following are a few other suggestions for avoiding blisters:
* Train your feet. Don’t go out on a long hike without taking the time to toughen up your feet by doing walks or short hikes leading up to the big day.
* Don’t try to break in brand new boots on a long hike either. Wear a new pair around town, or on short hikes, before taking them long distance.
* Walking barefoot around the house, especially outside, will toughen the skin of your feet.
* Stop and remove dirt, sand, or any other debris that gets in your boots ASAP.
* Air your feet out during a break in order to cool and dry them off.
* For people with feet that sweat excessively, try using extra-strength antiperspirant creams, roll-ons, or powders to reduce sweating.
* If you have areas on your foot that have caused problems in the past, try putting moleskin or athletic tape on before blisters have a chance to form.
* If you do develop a hot spot, cover them immediately with moleskin, athletic tape, Adventure Medical Kits GlacierGel pads, or even duct tape before they become blisters.
Treating Blisters: Well, if all of the above fails, and you still wind up with a blister, here are a few tips for treating them (and another good reason for keeping a small first aid kit in your pack).
* If the blister isn’t torn and is full of liquid, pierce it from the side with a sterile needle at its base and let all the fluid drain out. If the affected skin is still intact, don't remove it. Instead, cover the drained blister with moleskin.
* If the blister is already torn, carefully cut away the loose skin and clean the area with antiseptic. Allow it to dry and harden in the open air for as long possible. Before resuming your hike, put a band-aid or gauze over the torn blister and then put a layer of moleskin over the blister area. It’s best to cut a doughnut shaped piece of moleskin that fits around the blister rather than putting it directly on it.
* If you have a blister that's buried deep in the skin and doesn't hold a lot of liquid, it’s best not to puncture them. Instead, just cover them with a moleskin doughnut to relieve the friction.
If you have any other helpful tips, please feel free to add them in the comments section.
************************************************************************************
Check out our online trail guides:
- Glacier National Park: HikinginGlacier.com
- Grand Teton National Park: TetonHikingTrails.com
- Rocky Mountain National Park: RockyMountainHikingTrails.com
- Just released: Ramble On: A History of Hiking
Friday, September 7, 2012
Trail Mix
The following are a few outdoor-related stories that I've come across recently that I think you'll enjoy as much as I did. This week's theme, in part, will be beer and bears:
* Backpacking may never be the same again. In fact, we just may soon see the largest increase in the activity since Daniel Boone crossed the Cumberland Gap. Early next year, Pat’s Backcountry Beverages will begin offering dehydrated beer. The concentrated liquid is poured into their plastic carbonator bottle and mixed with a carbonating agent and water to create a tasty (we assume!) brew.
 * But it keep it away from the bears! A bear and her three cubs completely destroyed a cabin in Norway after drinking 100 cans of beer they found inside. There's an unconfirmed report that those bears actually knew Keith Moon.
* This story just might be as scary as the Sandman in Metallica's hit song: Last month a Minnesota Man awoke from a nap while hiking along the Superior Hiking Trail to find a bear hovering over him - face to face!
* Sadly, on August 24th, a solo backpacker was mauled by a grizzly bear in Denali National Park. I wanted to point this out because this was the first known bear mauling fatality ever recorded in the park. Given the concentration of grizzlies in Denali, I would've thought incidents like this have happened more often.
* Here's another classic example of the law of unintended consequences when government tries to engineer a specific outcome. National Public Radio recently published a very interesting series of articles on how the U.S. Forest Service's "takeover" of America's forests in 1905 has led to more, not fewer, forest fires. Fire historians call this the "Smokey Bear Effect".
* Check out the amazing photos from Leigh McAdam's hike to the Abbott Pass Hut on the Alberta-British Columbia border. She was part of a team invited by a media group representing Travel Alberta. A short video of their journey for the Travel Alberta website will be released later this fall.
* Here's an extremely interesting stat: since its creation, 99% of the Appalachian Trail has been moved from its original location!
* Next year the Glacier Park Lodge, just outside of Glacier National Park, will be celebrating its 100th anniversary. Big plans for the historic log structure are already being made. Here are a few old photos of the lodge.
Jeff
RockyMountainHikingTrails.com
Tuesday, September 4, 2012
Keep your cool during summer hiking
Summer hiking season is already upon us. Anyone who has ever been to Rocky Mountain National Park during the summer knows how hot it can get in the Central Rockies. I’d like to offer some tips for beating the heat during the summer months.
Before we dive into anything else, I would like to emphasize that the most important thing about hiking during the summer is staying properly hydrated. Hiking in hot, dry weather depletes your body of liquids. To replace lost fluids and electrolytes you need to drink frequently. If you wait until you feel thirsty, you’ll more than likely already be dehydrated. The more dehydrated you become, the less efficient your body is at cooling itself down, thus making your body become less efficient at walking.
Make sure you take plenty of water or some type of sports drink with you on any hike. Sports drinks are excellent sources of liquids because they replace both fluids and electrolytes. Good old Gatorade gets the job done for me.
You can sweat anywhere from 1/2 to 1 quart of fluid for every hour you walk in the heat. This fluid/electrolyte loss can exceed 3 quarts per hour if you hike uphill in direct sunlight and during the hottest time of the day.
When it's really hot, my wife and I will fill a couple of water bottles about half-way and stick them in the freezer the night before. Then, just before leaving for our hike the next day, we'll top-off the bottles with cold water. This way we'll have cool water to drink for a much longer time on the trail. Please note that you don't want to put a full bottle of water in the freezer as it will crack the plastic.
If you’re thinking about drinking water from the backcountry, know that it must be treated for Giardia lamblia, a parasite that can cause an intestinal infection with a variety of symptoms. To avoid this infection, boil water for at least one minute or use a filter capable of removing particles as small as 1 micron.
To help offset the effects of fatigue, bring a lunch and/or snack with you. Food is your body's primary source for fuel and salts (electrolytes) while hiking. Try eating a salty snack every time you take a drink.
Finally, stay away from sodas and alcohol as they will only promote dehydration.
Besides staying properly hydrated, there are a few other things you can do to help avoid over-heating while out on the trail.
For one, go slowly and rest often. Also, try hiking in the early morning as this is coolest part of the day.
Summer also provides a great opportunity to explore trails at the higher elevations in the park where it’s naturally cooler. Keep in mind, however, that the summer season usually brings thunderstorms to the Rocky Mountains. Never ascend above tree line when there’s lightning in the vicinity. If you’re already above tree line when a thunderstorm approaches you’ll want to descend immediately.
Wear moisture-wicking clothing made of polypropylene or polyester to carry sweat and moisture away from your body. Moisture-wicking material keeps you dryer, cooler and more comfortable than a sweat-soaked cotton shirt. It’s also a good idea to wear light colored clothing because it tends to reflect heat away from your body.
Wearing a hat - a baseball hat, or, preferably, a wide-brimmed hat - will help protect your face and neck from the sun. Don’t forget sunscreen either. Sun-burned skin makes you feel hotter.
Finally, you should be aware of heat related health issues on the trail. As part of your first aid training you should know the signs for heat exhaustion, heatstroke and even hyponatremia; and know what to do if someone in your party has any of these signs.
* For additional safety tips, please click here.
* To make sure you have all the essentials before heading out on the trail, please review our hiking checklist.
*******************************************************************************
From Montana to New Mexico, the American Rockies stretch for more than a thousand miles. Within this spectacular mountain range are thousands of miles of hiking trails. With such an overwhelming number of options, how will you find and choose the most scenic and rewarding hikes?
Ultimate Hiking Guide to the Rocky Mountains takes all the guesswork out by focusing on some of the most amazing hikes across this range, and provides you with a handpicked list of options that will allow you to make the most of your trips in the Rockies:
Subscribe to:
Posts (Atom)